• heעברית
  • Home
  • About
  • Let’s Talk!
Search
רשתות חבריות אנגלית
  • Facebook
  • Pinterest
  • Instagram
The Art of Creativity
  • Art Journaling
  • Start Here
  • Inspiration
  • Tutorials
  • Creativity
  • Workshops
  • Art Journaling
  • Start Here
  • Inspiration
  • Creativity
  • Tutorials
  • Workshops
  • About Me
  • Contact
The Art of Creativity
  • Art Journaling
  • Start Here
  • Inspiration
  • Tutorials
  • Creativity
  • Workshops
  • Art Journaling
  • Start Here
  • Inspiration
  • Creativity
  • Tutorials
  • Workshops
  • About Me
  • Contact

Blender Pen Image Transfer

15 February 2018

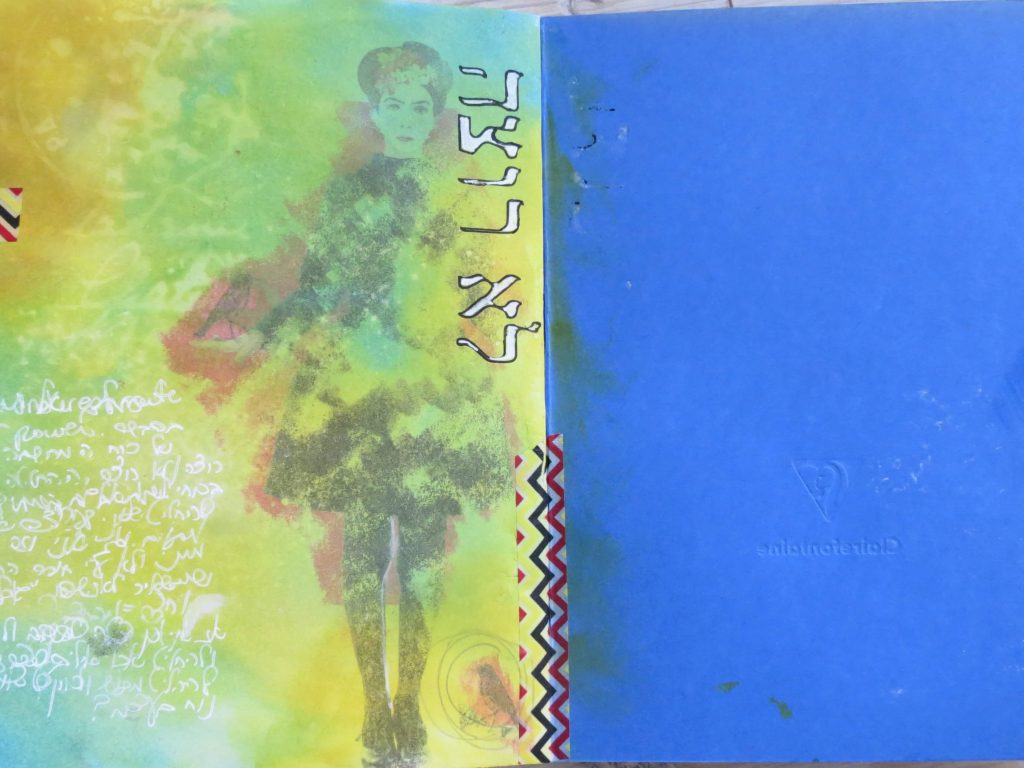
I’ve been working with image transfers for many years. I love how interesting the transfer makes my images, how it alters them and adds depth and meaning. I enjoy experimenting with different types of materials, and getting different types of transfers.

Basically, an image transfer is when you take an image, and manipulate it so that it lifts off the paper it’s printed on, and the ink is then transferred to another base. Images can be transferred from paper to fabric, canvas, and wood. I work with image transfers in my art journal, and I’ll share a very simple transfer today.


Image transfers in my art journal


This type of transfer is a solvent transfer. There are various solvents you could use, such as acetone and turpentine, all of which are toxic, so not highly recommended for use in a room, or at all, actually.

For this transfer I used a blender pen. Blender pens are used to blend colors when coloring, but in this case I used the pen to transfer images. The blender pen is also toxic, and I do recommend to work in a ventilated area, but I feel that it’s more contained than using the solvent itself.

I’ve tried many brands of blender pens, and the one that works best is the AD Chartpak Blender Marker. For this transfer, you’ll need the AD Chartpak Blender Marker, and  some images.


blender pen transfer in my art journal


Images suitable for transferring using this method would have to be laser printed, or photocopied in a shop. It’s not possible to transfer images printed or copied by an inkjet printer.

Let’s get started!

You’ll need the blender pen and some photocopies of your images, or images printed using a laser printer.
Remember you can transfer any image, just photocopy it before you do!
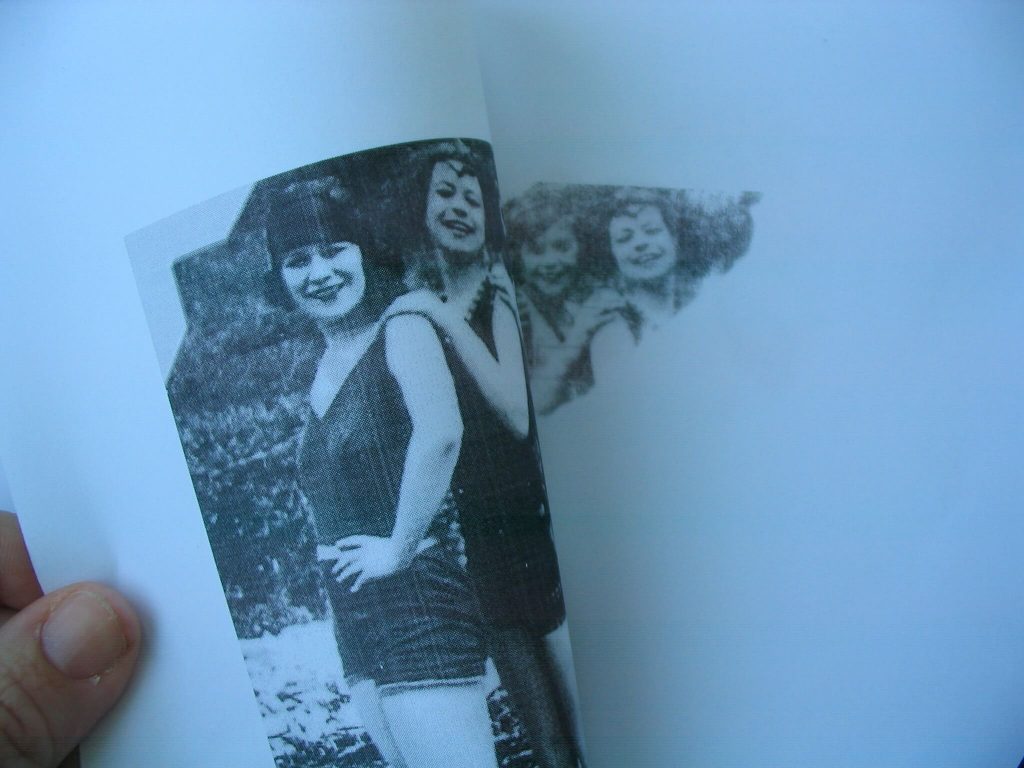
I printed this vintage photo –


Blender pen photo transfer tutorial


and then turned it face down on the paper to which I’m transferring.


Blender pen photo transfer tutorial


I then started painting the back of the picture with the blender pen:


Blender pen photo transfer tutorial


And… there it is! The photo is transferred to my paper! it’s that simple! As you are working, you can carefully pick up the edge of your paper to check whether the image is coming through.


Blender pen photo transfer tutorial


This is a very simple and quick transfer, very satisfying, and you could try to transfer any image and play around with it! I recently visited the SF MOMA to see Robert Rauschenberg’s wonderful exhibit, which was really mind bogglingly amazing, and he used lots of types of image transfers, many of which were solvent transfers. Here are some pictures I took:


 Robert Rauscenberg image transfers


 Robert Rauscenberg image transfers


 Robert Rauscenberg image transfers

 Robert Rauscenberg image transfers

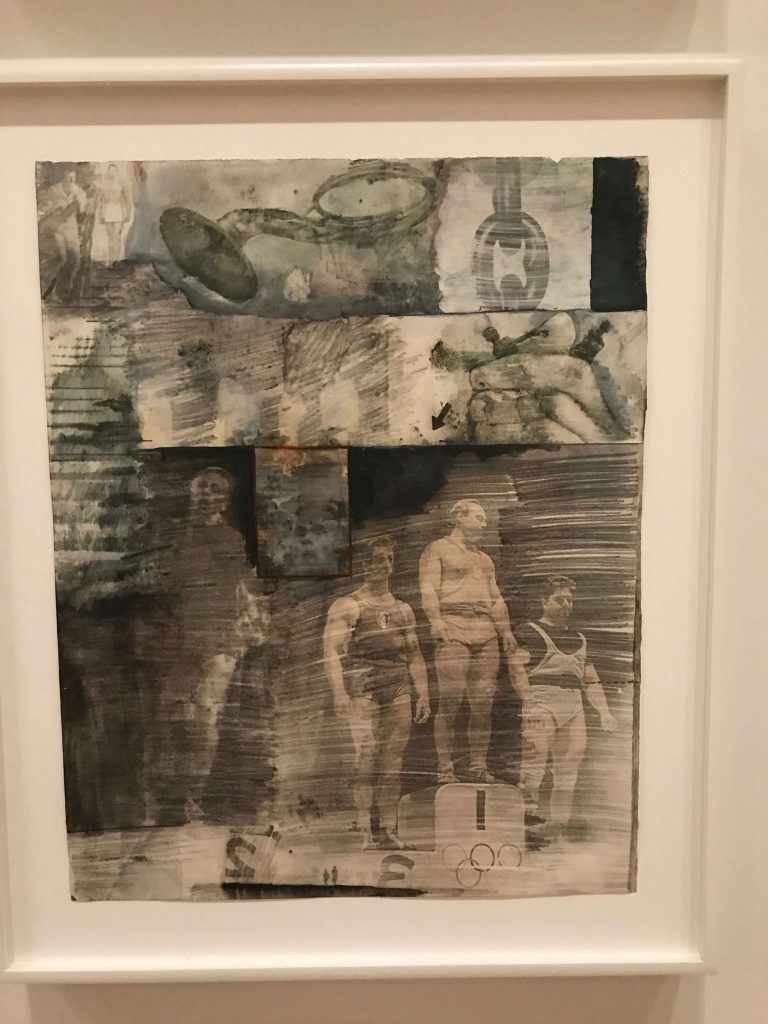
If you’re in the area, that’s a wonderful exhibit to see, it covers all of his life and work, and it’ll be around until March 25.

If you have any questions about this tutorial or image transfers in general, please join my Facebook group, Art Journaling and Mixed Media, or join one of my workshops in the San Francisco Bay Area!

I hope you found this post interesting, and would be delighted if you shared it!
Enjoyed reading this post?

Subscribe to my newsletter and get more inspiration, how-tos and updates!

Your e-mail is safe with me, I will never share it with anyone else.

Leave a Reply

Click here to cancel reply.

Hagit's profile image

Hello, I'm Hagit
Welcome to my blog.

[ read more -> ]
Some more inspiration
  • Facebook
  • Pinterest
  • Instagram
Recent Posts
A year in the life

A year in the life

Fun Rorschach Painting DIY

Fun Rorschach Painting DIY

DIY Clutch from Painted Papers

DIY Clutch from Painted Papers

In my studio: permission to play

In my studio: permission to play

Home made washi tape tutorial

Home made washi tape tutorial

search the blog
I write about
art journals books image transfers in the studio my process paint pouring play printmaking tutorials video

Some links in this blog are affiliate links. If you purchase through them I may receive a tiny percentage of the purchase. All opinions and recommendations, however, are my own, and I would never recommend about something I haven’t tried or think is less than amazing.

A Picture Is Worth A Thousand Words
  • heעברית
©All rights reserved to Hagit Azoulay Rozanes. It is absolutely forbidden to make any commercial use of the site's content or parts of it without prior written consent.
Site designed and built by: Sharon Rotem
Subscribe to my newsletter

Enter your e-mail get my newsletter, delivered straight to your inbox every Friday. With creative prompts and inspiration, It’s sure to make your weekend more fun and artsy!

Your e-mail is safe with me, I will never share it with anyone else.

Scroll to top
Skip to content
Open toolbar

כלי נגישות

  • הגדל טקסט
  • הקטן טקסט
  • גווני אפור
  • ניגודיות גבוהה
  • ניגודיות הפוכה
  • רקע בהיר
  • הדגשת קישורים
  • פונט קריא
  • Reset