
I love interactive cards, and I love this one even more because it’s so simple and so fun to teach kids too! The shutter card is very simple, I’ve done it in one hour classes with 10-11 year olds, and I’ve finally written this tutorial, I hope you enjoy it as much as we did!
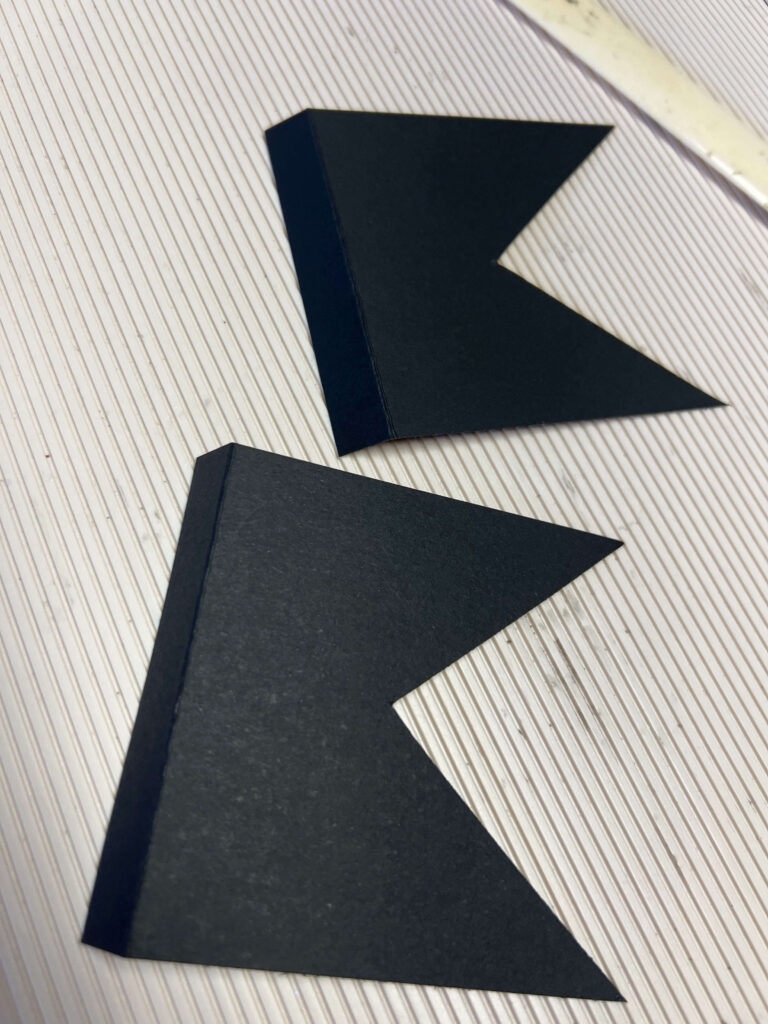
These are two of the cards students in fifth grade made:
I know there are many other tutorials and ways to make this card, but I think I simplified it a bit, and hope you find it useful and fun! Let’s start!
Materials
Cardstock
Patterned paper
Double sided tape
Dimensional/foam double-sided tape
Sticker/drawing/stamp that will pop from under the shutter
Ruler
Circle cutter (you could use a punch, I used my trusty Big Shot, or you could trace a circle and cut with scissors!)
Also, this is my favorite paper cutter, and this is my scoring board. Obviously, you don’t need these specific brands
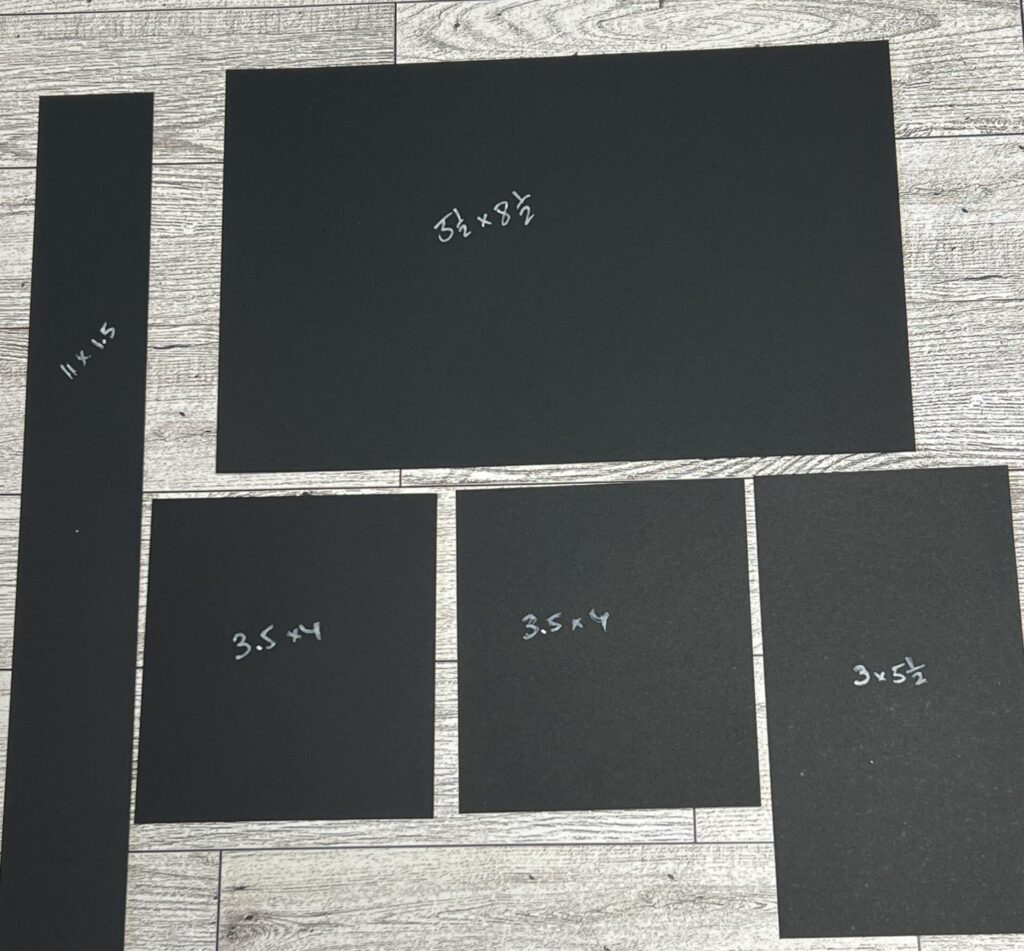
We start by cutting the cardstock as follows:
Our card base will be 5.5″X8.5″ For inside the card we need a 3″X5.5″ strip from which we will later cut out a circle 2 strips – 3.5″X4″, from which we will cut “flags” which will make the shutter 10″X1.5″ belt which will serve as our closure for the card Here are all my cardstock pieces –
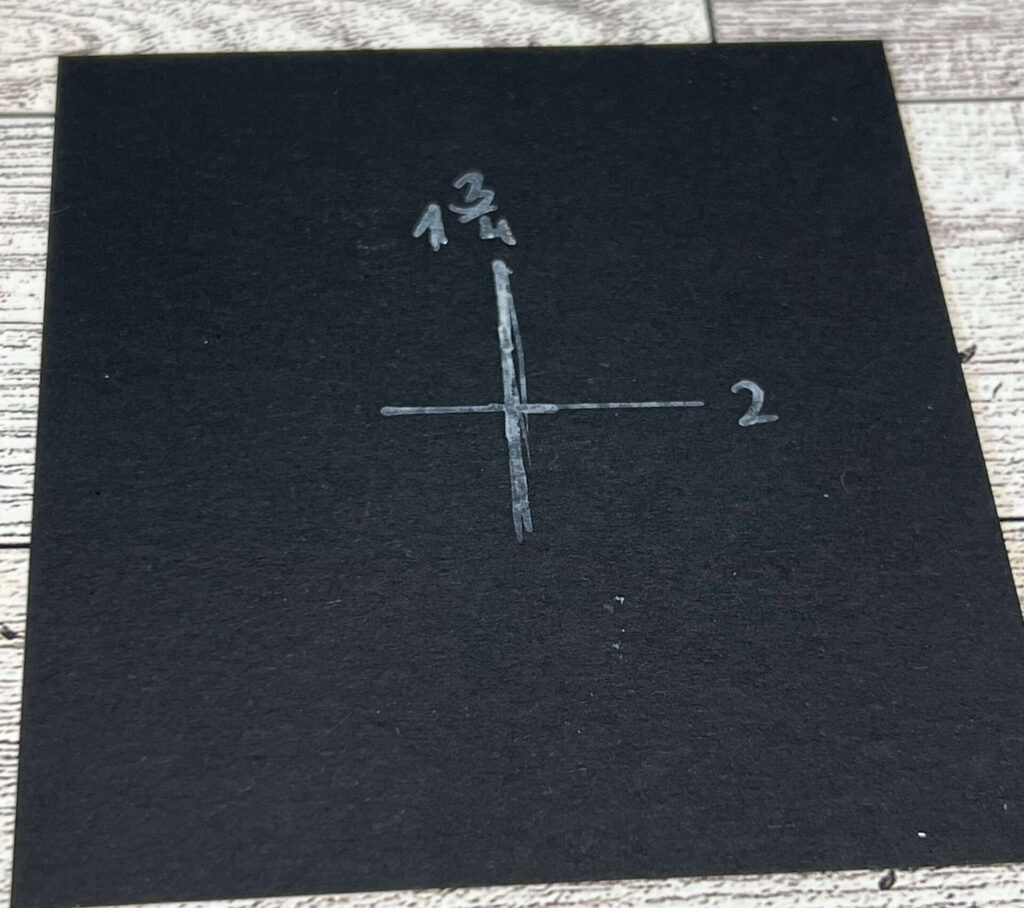
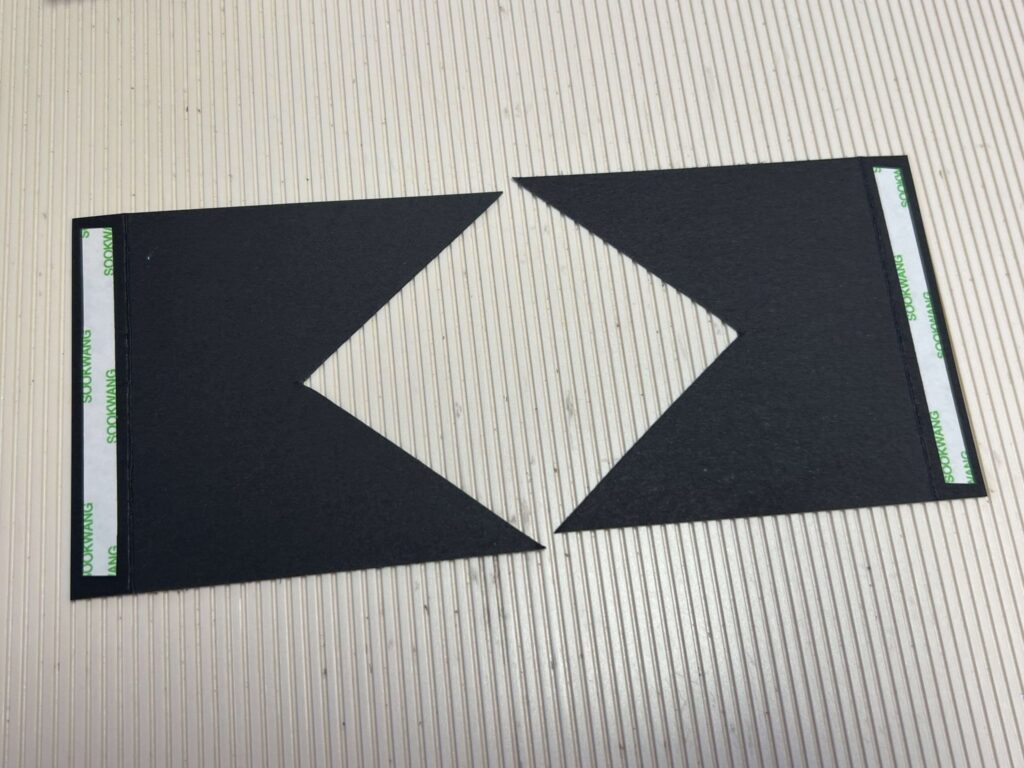
Let’s start by making the shutter openings. We’ll take the 3.5″X4″ pieces, and work on one of them. We need to find its center, so I did that by marking my center with a pencil and ruler. The center for my 3.5″ side will be marked at 1.75″, and on the 4″ side I’ll mark the center at 2″. This is how I do it:
I then draw a line from the center point to both of the bottom corners-
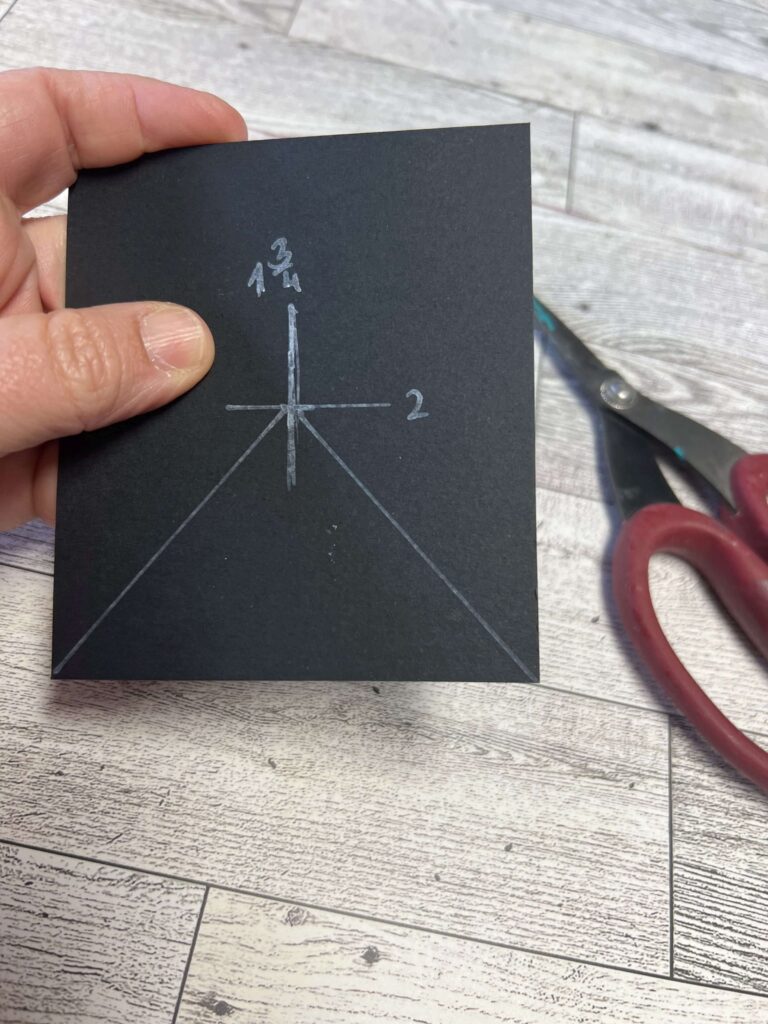
Let me tell you, when I’m not writing a tutorial, but just making cards for pleasure, I do not go through this whole process!! Rather, I eyeball the center point and just go ahead and cut the paper! However, if you’d like to do it the “right” way, you got it!
Now I’ll cut the little triangle that my pencil lines formed. I put both my pieces together to save time, and cut them both following the lines I made on one of my pieces, saves me the need to measure and mark both! And this is what you’ll get –

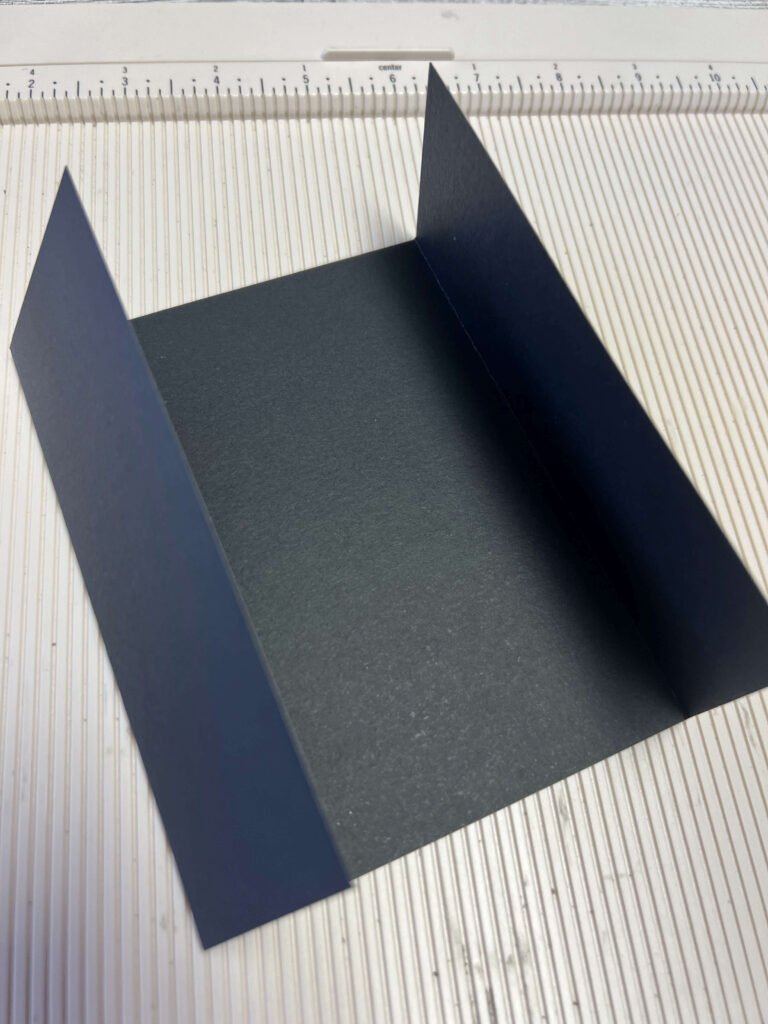
Now let’s get to the scoring board. We’ll score our card base (5.5″X8.5″) with the 8.5″ side on top, at 2 1/8 and 6 3/8, to make a gatefold card.
We’ll score the two “flags” we have at 0.5″, and fold them along the score lines, front and backwards to make the paper a little flexible, since this will be the card’s opening mechanism,
Here comes the fun part, adding patterned paper! I cut the paper, and use double sided tape to attach to my pieces-
1 piece – 2 3/4″ X 5 1/4 for the center part inside the card. 4 pieces – 5 1/4″ X 1 7/8″ (can be from 2 different patterns, as you wish)
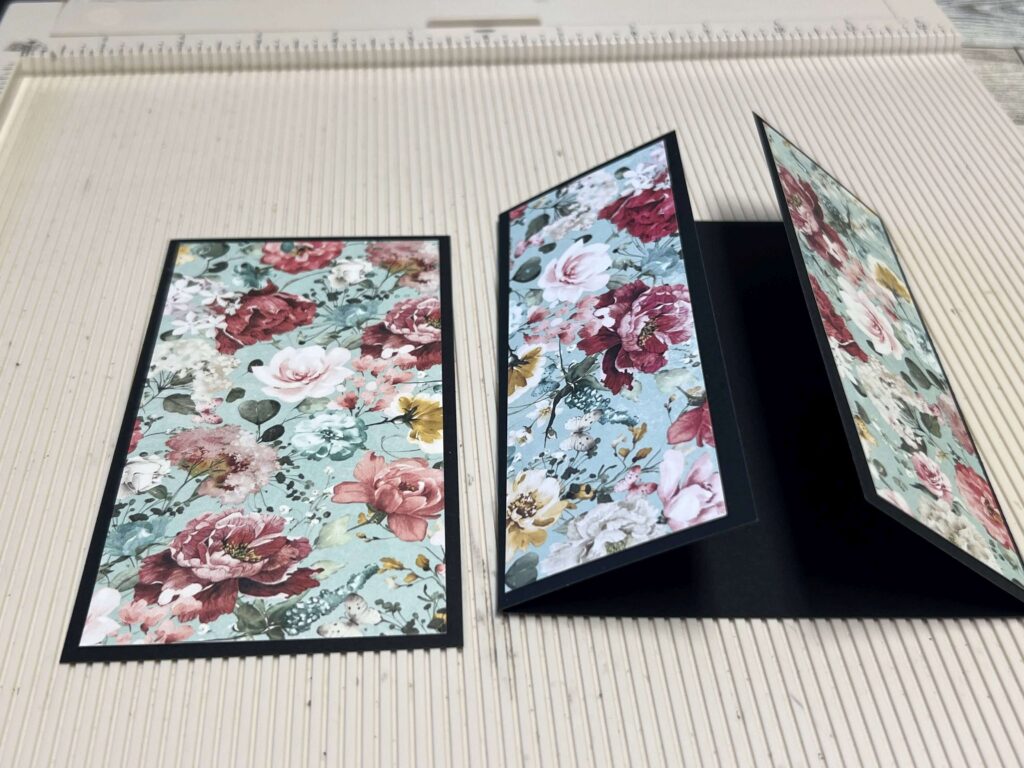
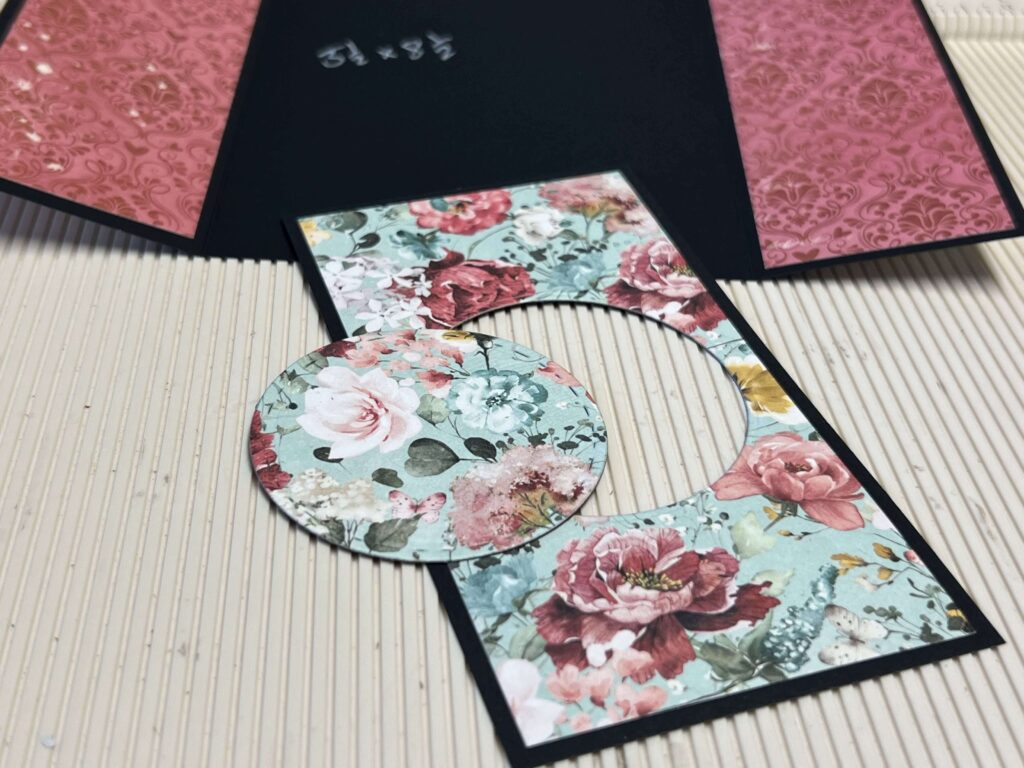
This is what the card will look like on the outside –
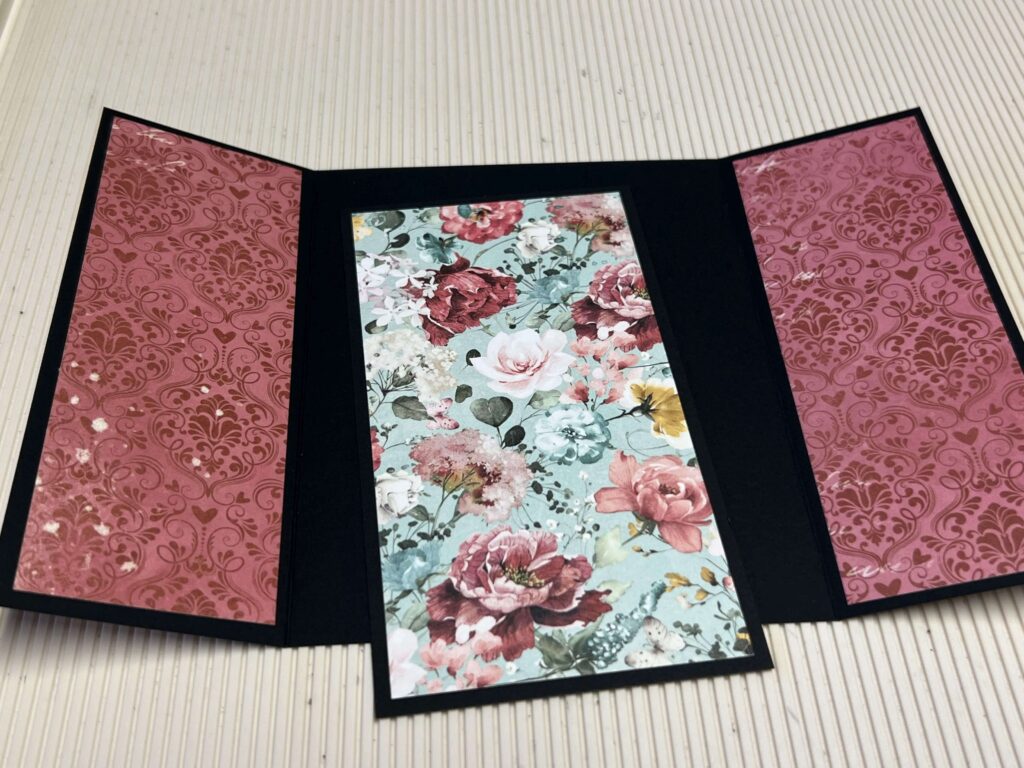
And inside (that’s not dirty, it’s the pattern!! :-))
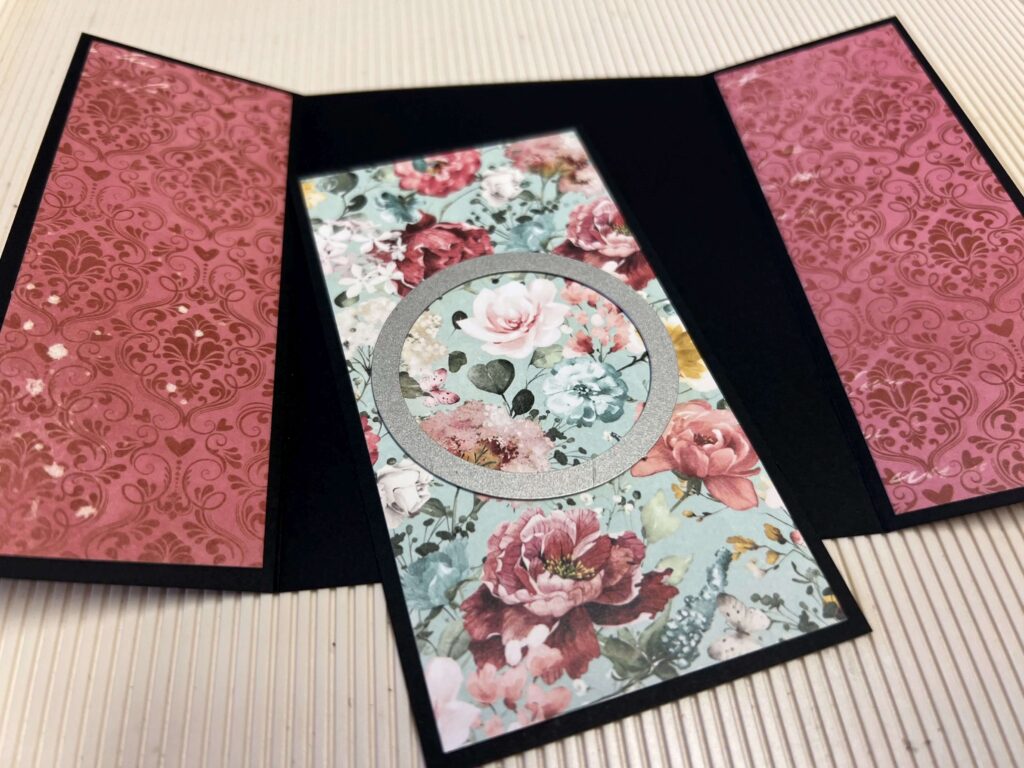
At this point I need to create a circle in the middle of my flowery pattern to go inside the card, at the center. I do this with my Big Shot, I LOVE how simple it is (it’s totally manual, very straightforward), but you could do this with scissors or a circle punch as well. Notice the size of my circle, I want to leave a little bit of a “frame” around the edges. I tried making the circle larger, but if the edges are too thin, it doesn’t work as well. My circle size is 2.75″.
I set the circle I cut to the side, I will use it later, as a buckle to the card belt.
It’s time to make our greeting/sentiment, whatever you’d like to peek under that shutter. I would have to stick a sticker/stamp/ little drawing in the center, and center my piece that has the circle cut out from it, above it. I used a white piece of paper on which I stuck a sticker. You could also write, draw, stamp, or make this sentiment any other way you like. This is my paper with the sticker, before putting it down.
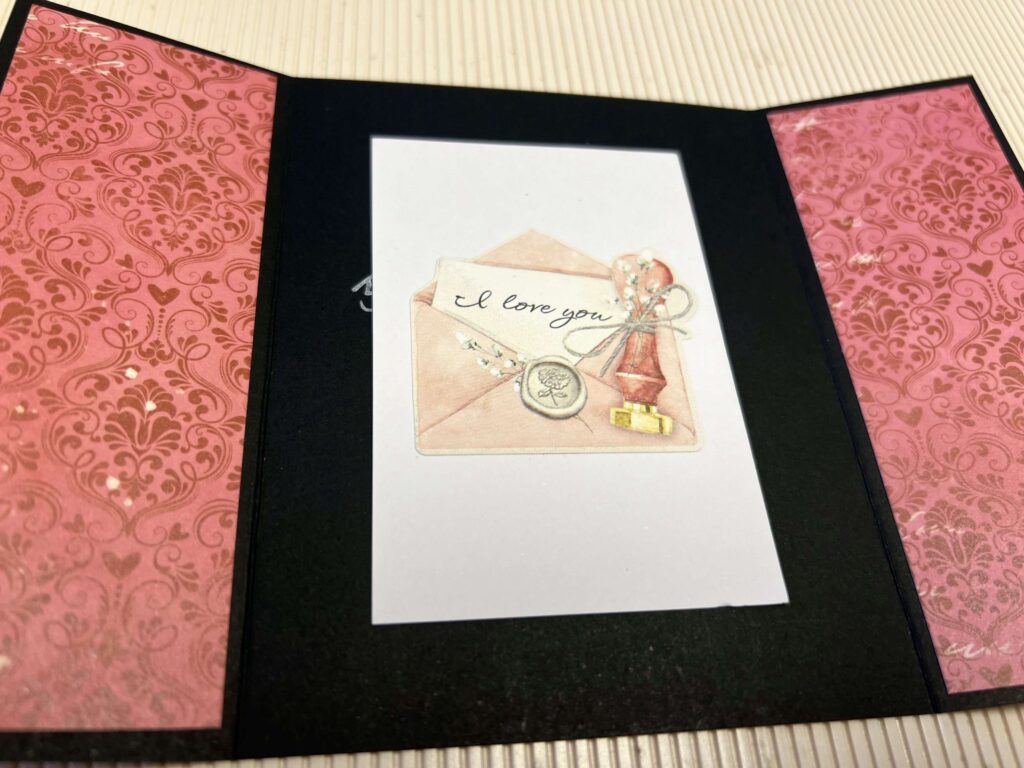
I situate it over my “window”, check that the sticker is peeking the way I’d like it to look, and I glue down my paper, on the card base itself. I haven’t yet glued my “window”, I’m just hovering it to check where I’d like to stick my sentiment.
After gluing down my sentiment, I’m ready to stick down the “window”. I use dimensional double-sided tape, but I’m starting by just sticking down the top part of my rectangular piece. Don’t peel the tape off the bottom yet.
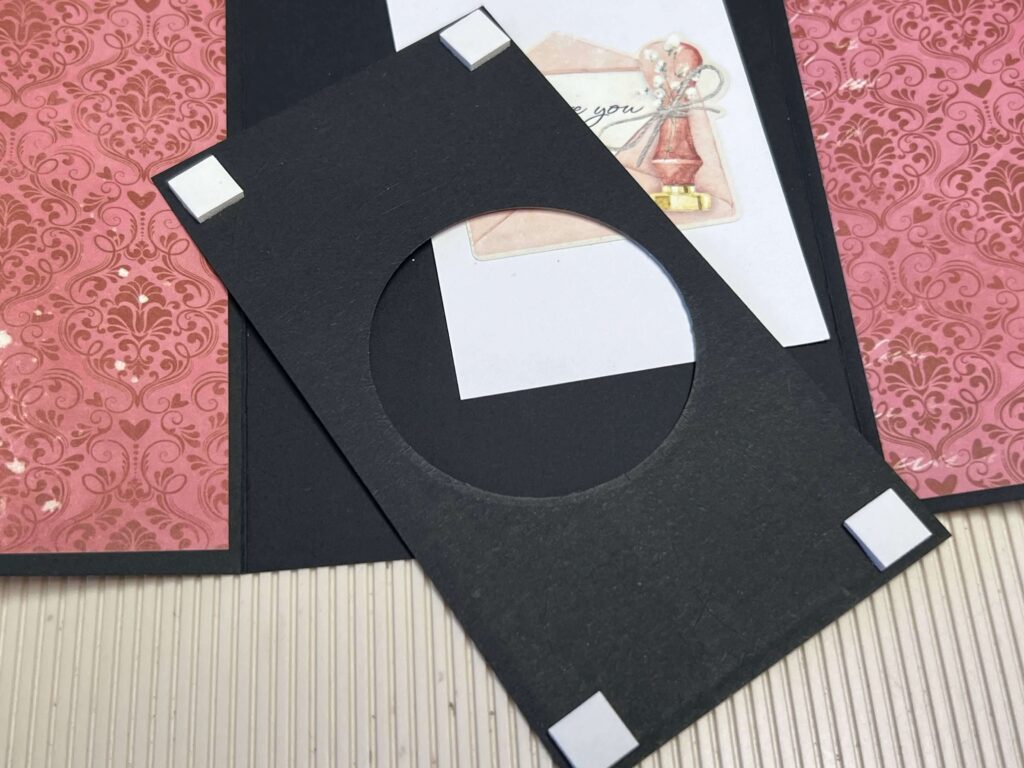
Here it is, stuck down only by the top part. I haven’t peeled the tape of the bottom yet, because I want to have enough space to slip the “flags” that make my shutter, under there.
It’s time for my “flags” now, and I use double sided tape on them –
I slip in my first flag (the order doesn’t matter), under the window I made. I line up the side of my flag with the card’s score line, and bring it as close as possible to that score line, without actually touching it. At the same time, I center the flag on my paper and notice where it goes inside the circle. It should look somewhat like PacMan 🙂
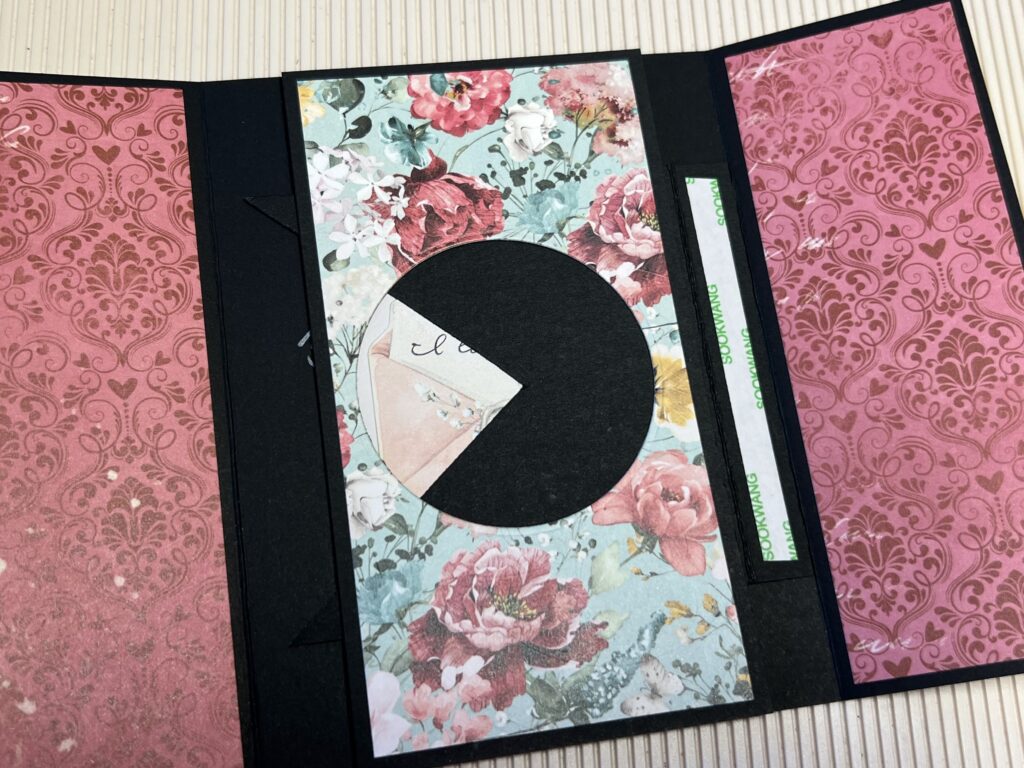
I now peel off the tape, and fold the flap on it.
When I open the flap that I stuck down, it will pull on the flag, and it should look like this –
We will now do the same thing on the other side. This time, it’s important for the new flag I’m inserting to be either over or under the flag that’s already there. We don’t want them overlapping at the center. I’m lining up the new flag with the one that’s already stuck down, and I do my best to line up the two little triangles marked in the picture below, while keeping the flag’s side as close as possible to the score line. Now I take off the backing from my tape –
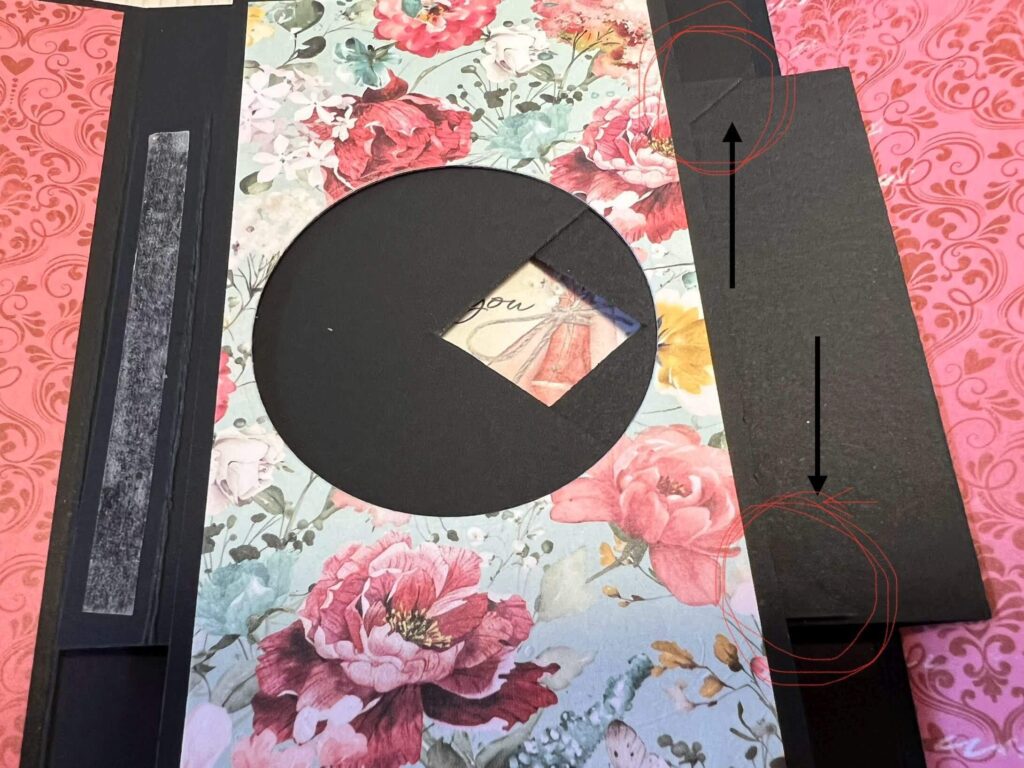
And I close down the card’s flap on top of the tape.
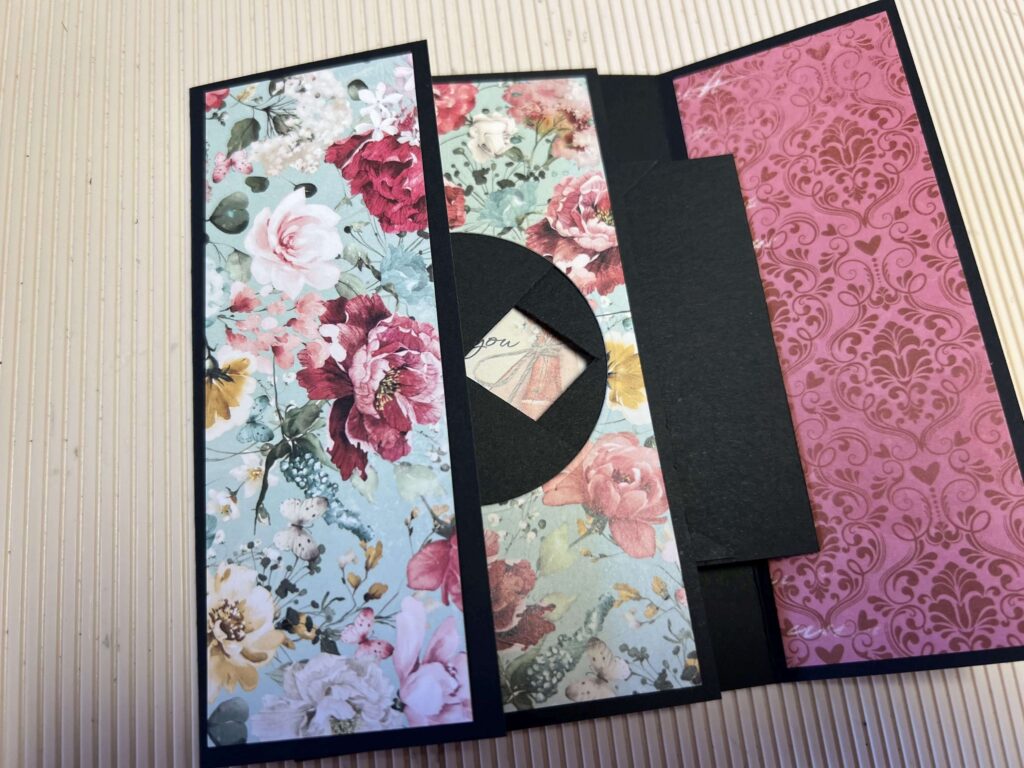
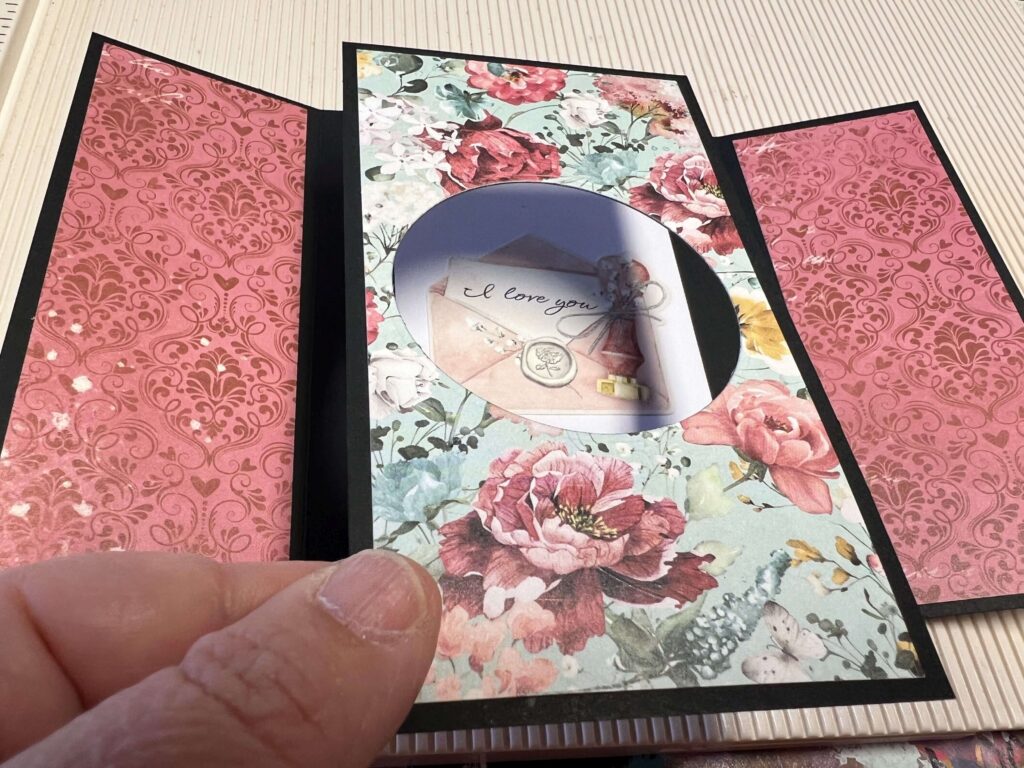
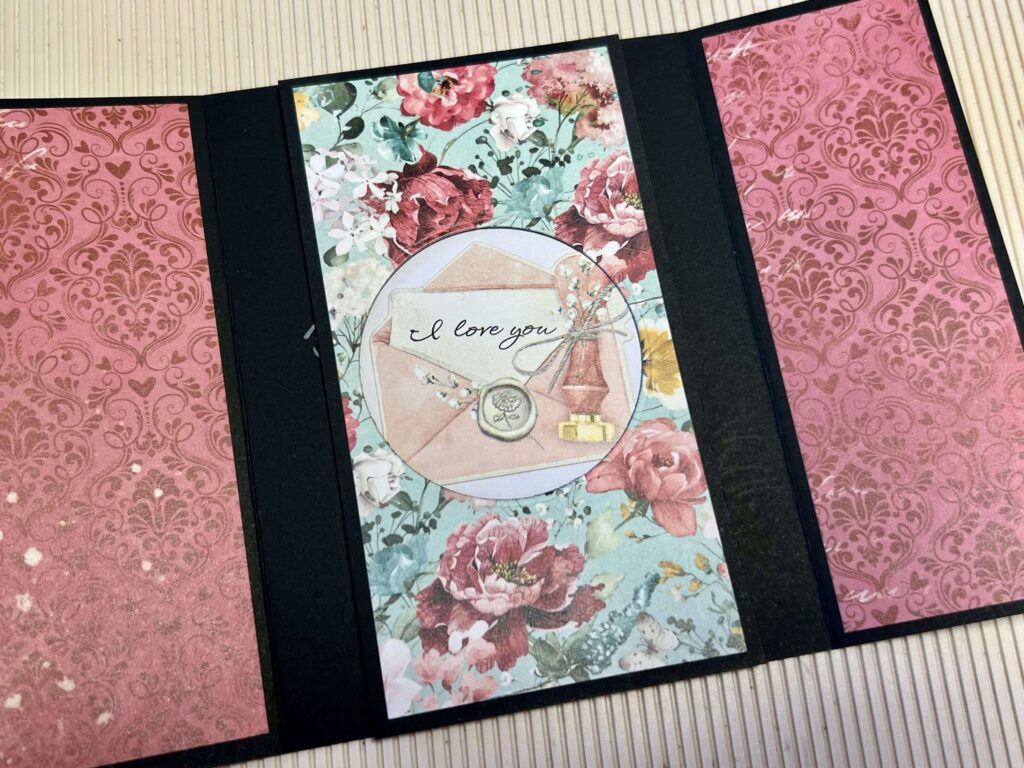
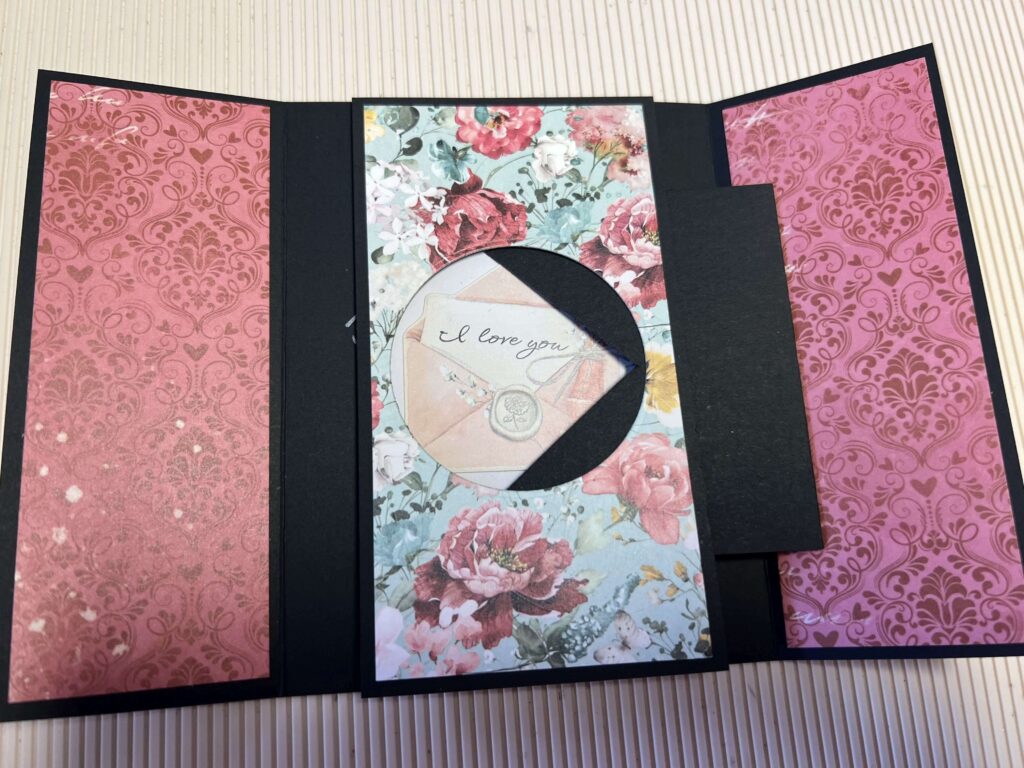
This is what my card will look like, opened. We’re almost done!
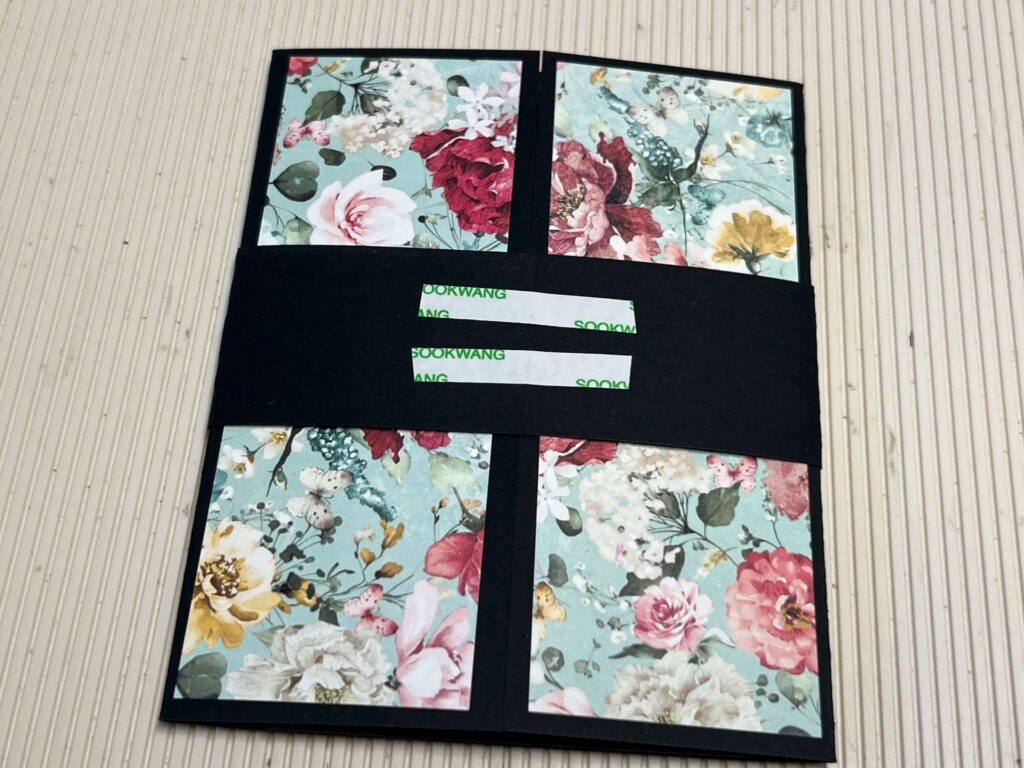
Remember how we only stuck the top of that center panel? Well, now’s the time to peel the backing off the tape on the bottom, and stick it down to my card. That’s it!! Shutter card is finished! We only need the outer belt for a fine finish, so let’s take that belt, and close it around the card, taping it in the center. On top of that center fold, we can stick the circle we saved from before, or add any embellishment you’d like.
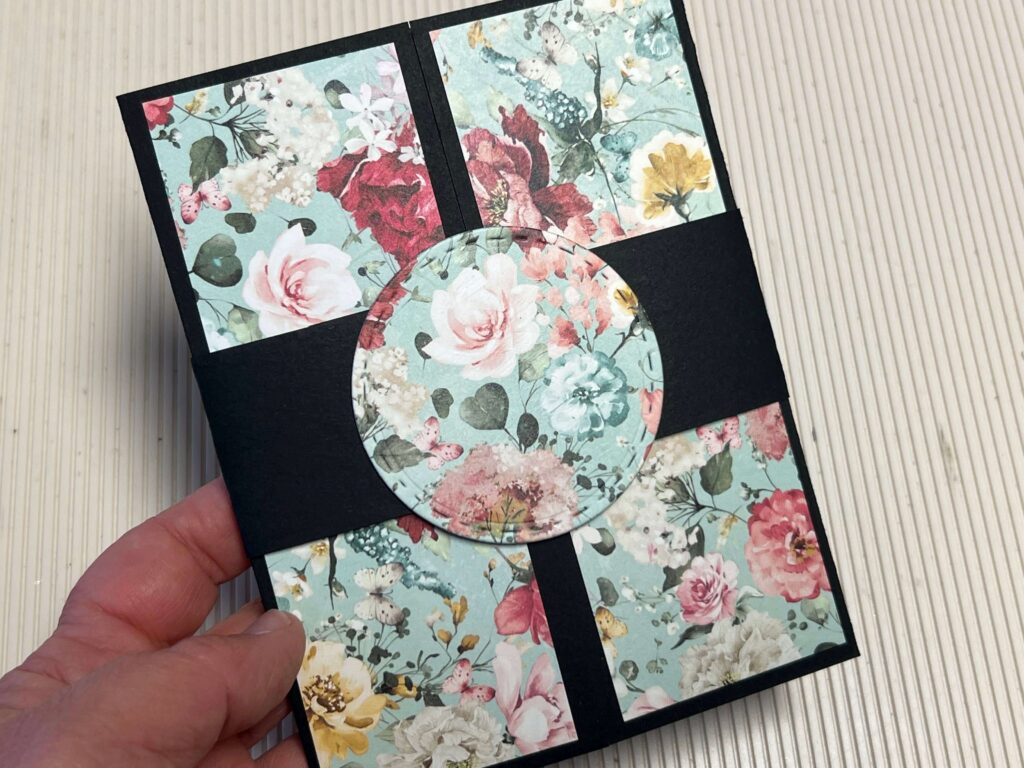
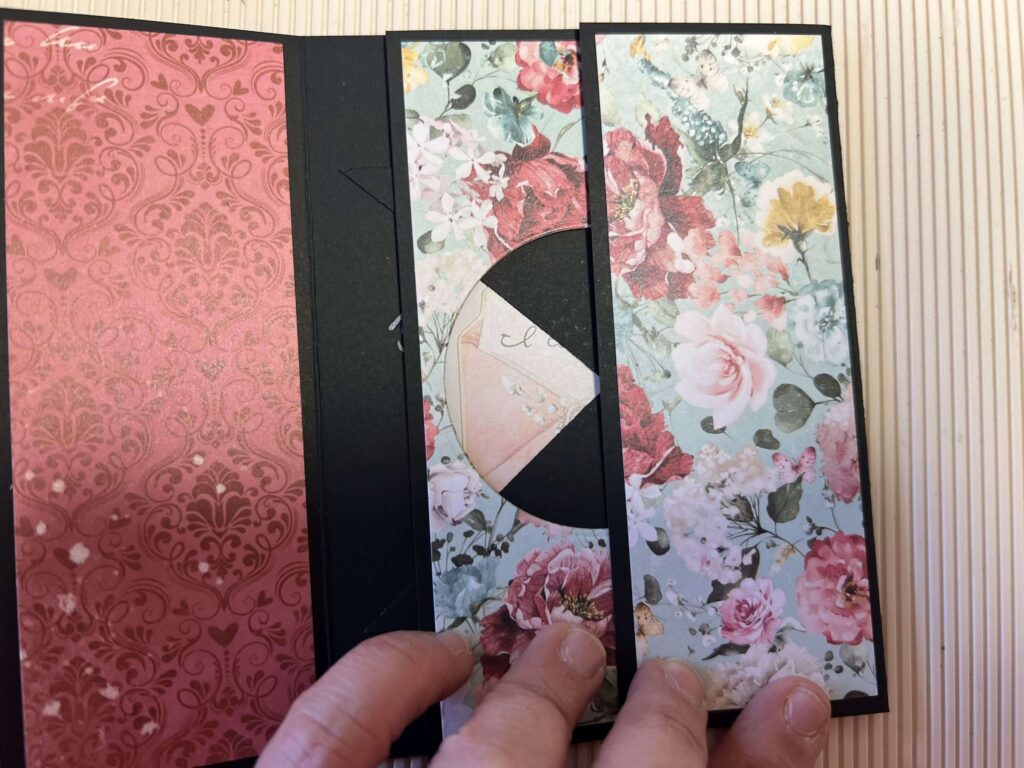
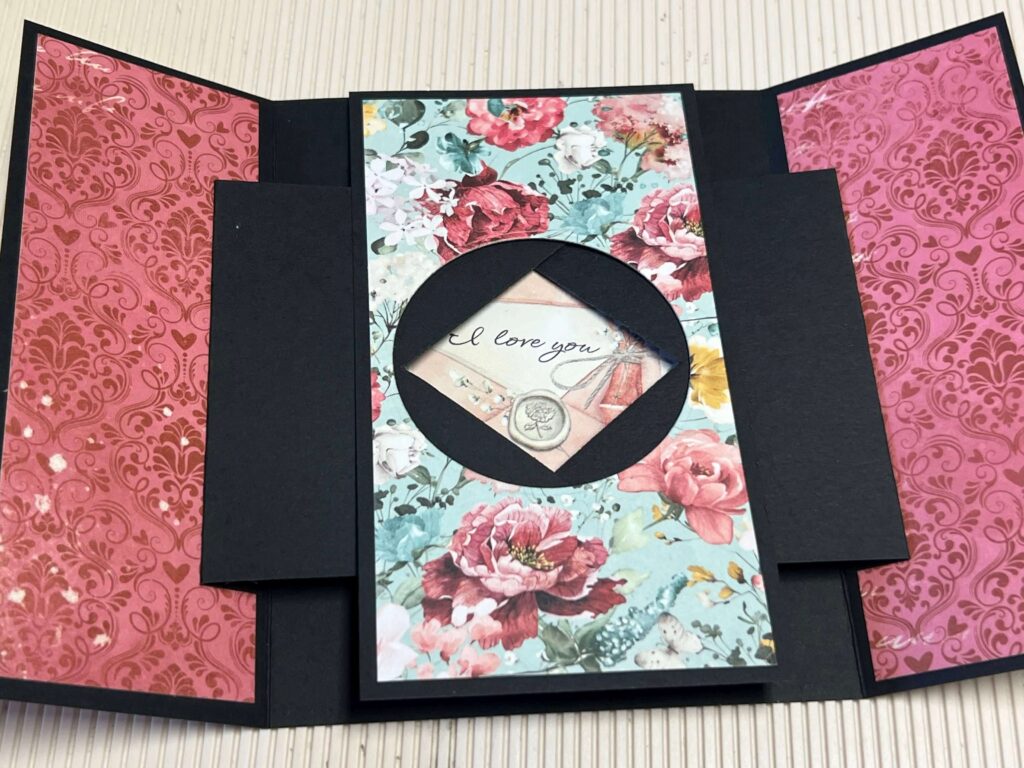
that’s it! Your card is ready! Here it is in action –
I hope this gives you motivation to try it out on your own, I know it seems like a lot, but it’s actually one of the simplest cards out there!! Go for it! 🙂


