
I love examining art processes, I find them captivating and instructive. I love peeking “behind the scenes”, trying to understand how it’s done, what the artist was thinking, what had inspired them, it’s all so interesting! When I make art, I prefer to concentrate on my work, but nowadays my camera (umm.. smartphone) is an integral part of my work, for various reasons, one of which is the fact that I enjoy shooting the different stages my work is at. Sometimes, you lose hours worth of work because you decided to use a color you don’t like, so I like to take pictures of my work in different stages, that way I can always print a picture and start over!
So this is a process I had taken pictures of in my art journal, and I thought I might as well share it, since I had so many pictures of it. I think looking at someone else’s process is like peeking into their mind. Their ideas, and how they evolve. So much happens in there! I hope you enjoy this!
First step – Choose an Image
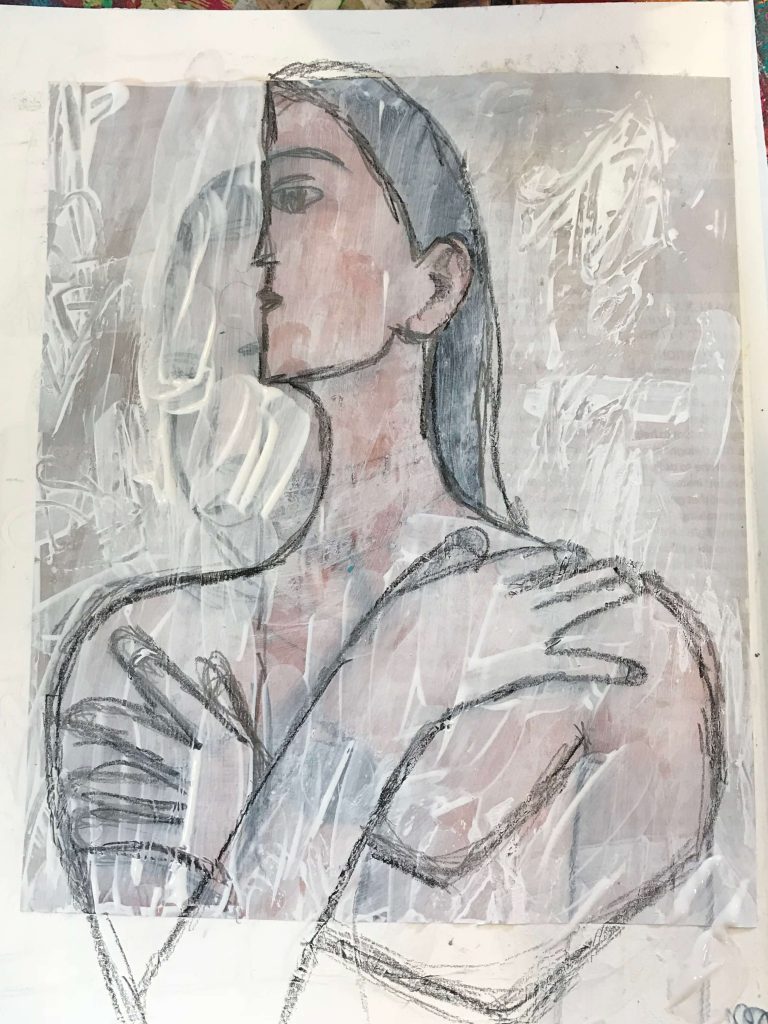
I chose an image I liked from a magazine. It seemed interesting, because of the way the image is kind of cut, made me think of Picasso’s cubist portraits, and I just glued it down in my art journal.

Step 2 – Add Gesso and Pencil Marks
Back to the art journal. I laid down some gesso on my paper, and traced around the image with Stabillo-All pencil. I love this pencil because it’s so soft, and it’s water-soluble, so after tracing, I can softly go over it with some water on a brush. Later in this process, you will be able to see pictures of where I used water on these pencil marks. At this point, I looked at my image, and realized I no longer care about the two halves of the original picture. I decided to just paint one woman, with a special, quirky look.

So I added some gesso to erase one part, and then re-traced the parts that I was keeping. Note that I like to spread my gesso unevenly. I do that on purpose, because I like the texture and added interest.

Step 3 – Ready to Commit!
I took another look at my woman, and decided I really like her, and am ready to commit! So I drew her out. I tried to draw realistic hands, but that wasn’t working for me, so I drew childlike fun arms, just let my imagination roll! I was very happy and enjoying my process, and had to remind myself to let go of the expectation that hands should look like hands. Nope, they can look weird, too!
At this point I had to take a break for dinner, after which I also read my daughter a book, and in it was this beautiful drawing, which fully validated the imperfect hands I had drawn earlier! Love this!
Step 4 – Collage Papers
I collaged some papers I had printed on the gelli plate. I love how random and colorful and interesting they are!

Here’s a small trick I really enjoy playing with. When a random piece of collage paper fits my drawing perfectly, I take the cue and go with it! So here, you can see a line on my gelli print. This line can fit in naturally with lines in my drawing!

So this is how I could glue down this piece of paper, lining that printed line with the shoulder line in my painting.
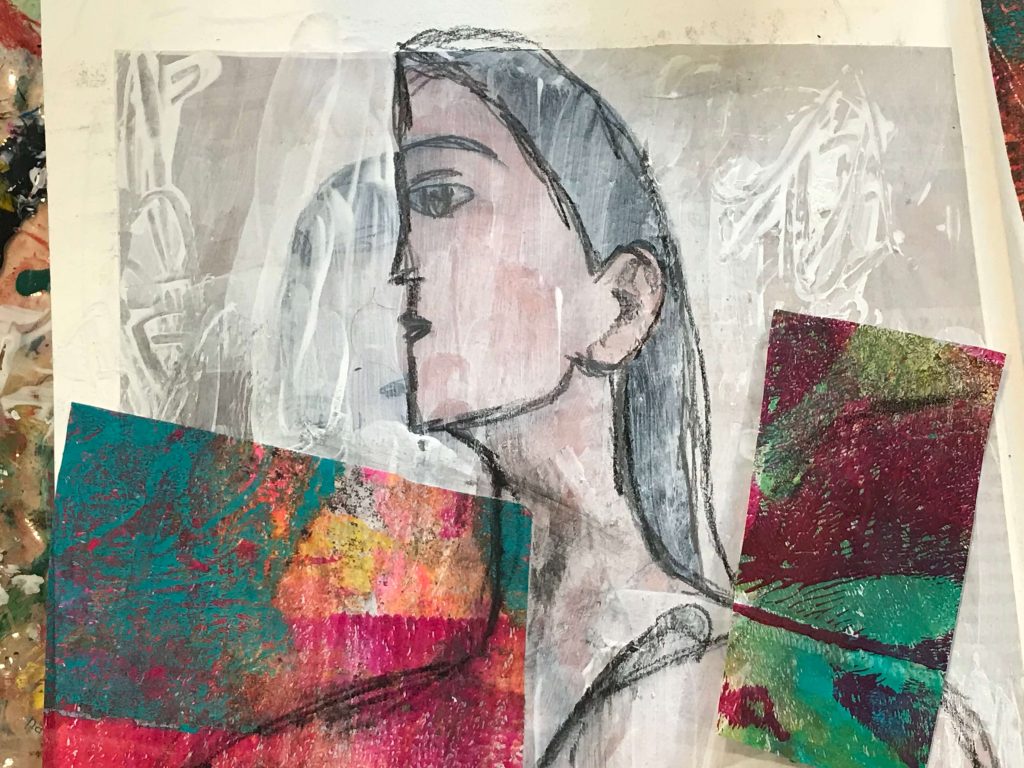
However, I ended up gluing it on the neck line. SO many possibilities!! I added some more papers.

At this stage I’m just enjoying more collage, adding paper and textures, I have no idea where this is going or what I’m doing, I’m just gluing down things that I like. It’s very random, I don’t think too much, I just use the papers I have on my table, cut and glue them. At this stage I also added water to a brush, and went over my pencil marks, activating them. You can see how they’ve become darker.

Final Stage – Paint!
I used acrylics and went to town! I tried lots of colors and shades, used water to dillute some, others I used straight from the tube, all the time rubbing, adding, brushing on and taking off. I was having lots of fun, so didn’t take too many pics of the process, but believe me, there are LAYERS in there! I enjoy this part of “letting go” so much! It’s really just play. I let my thoughts loose, just feeling what makes me feel good and what doesn’t.
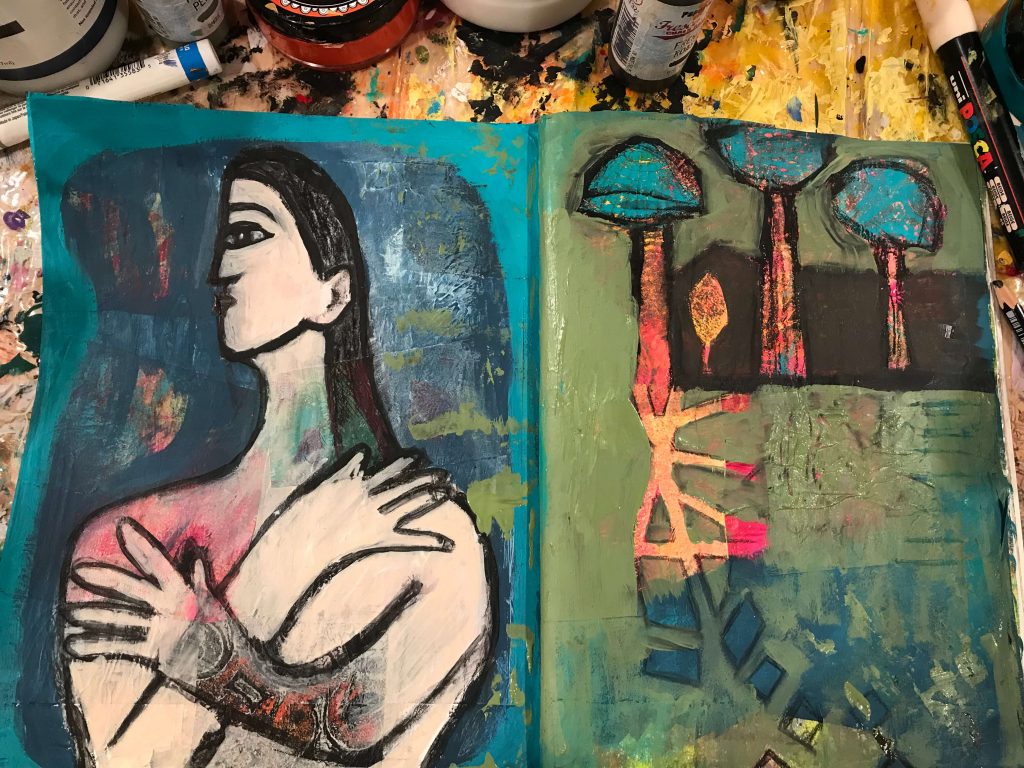
This is what my final spread looks like. I love it, and at this point I felt that I was done. It’s my art journal, and I can always come back to these pages, but for now, my process is done. I’m happy!

I hope you enjoyed this peek into my process! If you have any questions, feel free to ask them in the comments below. Thanks for reading!


